Windows Support Tools

  • Subscribe to our RSS feed.
  • Twitter
  • StumbleUpon
  • Reddit
  • Facebook
  • Digg

Tuesday, 7 December 2010

SPF Validation – Sender Profile Framework Testing and Checking Tool

Posted on 01:10 by Unknown

The SPF validation testing makes use of service powered by

Enter Your Email Address or Domain or SPF String

For the SPF tester to work and correctly validate the SPF record, the existing SPF record must be made known. For example, value accepted for this SPF tester is example.com or user@example.com or v=spf1 -all, where the checker will try to retrieve the information from DNS.

Enter the Originating IP Address of Email

The IP address of SMTP mail server which normally send the outbound email for domain. If left blank, the SPF testing utility from DNSStuff will use the IP address from which you browse this page. Correct IP address must be entered for SPF validation test to return the correct result. Value accepted is in the format of IPv4, i.e 188.8.8.8.


Possible SPF Testing and Validation Results

* Pass – This IP is authorized to send E-mail from this domain.
* Fail – This IP is not authorized to send E-mail from this domain.
* SoftFail – This IP probably is not authorized to send E-mail from this domain, but the domain owners are not certain.
* Neutral – The domain does not know if the IP is allowed to send E-mail or not.
* TempError – A temporary error occurred. The E-mail should be retried later.
* PermError – A permanent error was encountered. The E-mail should be rejected.
* None – No SPF record was found. It cannot be determined if the IP is allowed to send E-mail from this domain.
Read More
Posted in | No comments

WikiLeaks

Posted on 00:58 by Unknown

WikiLeaks is a non-profit media organization dedicated to bringing important news and information to the public. We provide an innovative, secure and anonymous way for independent sources around the world to leak information to our journalists. We publish material of ethical, political and historical significance while keeping the identity of our sources anonymous, thus providing a universal way for the revealing of suppressed and censored injustices.

Secret US Embassy Cables

Wikileaks began on Sunday November 28th publishing 251,287 leaked United States embassy cables, the largest set of confidential documents ever to be released into the public domain. The documents will give people around the world an unprecedented insight into US Government foreign activities.

The cables, which date from 1966 up until the end of February this year, contain confidential communications between 274 embassies in countries throughout the world and the State Department in Washington DC. 15,652 of the cables are classified Secret.

The embassy cables will be released in stages over the next few months. The subject matter of these cables is of such importance, and the geographical spread so broad, that to do otherwise would not do this material justice.

The cables show the extent of US spying on its allies and the UN; turning a blind eye to corruption and human rights abuse in "client states"; backroom deals with supposedly neutral countries; lobbying for US corporations; and the measures US diplomats take to advance those who have access to them.

This document release reveals the contradictions between the US’s public persona and what it says behind closed doors – and shows that if citizens in a democracy want their governments to reflect their wishes, they should ask to see what’s going on behind the scenes.

Every American schoolchild is taught that George Washington – the country’s first President – could not tell a lie. If the administrations of his successors lived up to the same principle, today’s document flood would be a mere embarrassment. Instead, the US Government has been warning governments -- even the most corrupt -- around the world about the coming leaks and is bracing itself for the exposures.

The full set consists of 251,287 documents, comprising 261,276,536 words (seven times the size of "The Iraq War Logs", the world's previously largest classified information release).

The cables cover from 28th December 1966 to 28th February 2010 and originate from 274 embassies, consulates and diplomatic missions.

For more refer the link.
Read More
Posted in | No comments

Monday, 6 December 2010

Alcohol 120% v5 Blu-ray Burner Free Download with Registration Unlock Code

Posted on 20:24 by Unknown


Alcohol 120% is a CD and DVD burning, copying, backup, recording, duplication, emulation and creation software for Windows. In addition to creating backups of DVDs (except those with CSS protection) and CDs, Alcohol 120% also can support up to 31 emulated virtual drives to mount the disc images. Alcohol 120% combines all functions of Alcohol 52%, a CD & DVD emulation software, and adds DVD and CD burning capabilites.

Alcohol 120% features a Pre-Mastering function which lets users burn files directly from hard drive, and supports Blu-ray format and HD DVD. Alcohol 120% supports a wide range of CD/DVD image files including .mds, .iso, .bwt, .b5t, .b6t, .ccd, .isz, .cue, .cdi, .pdi and .nrg formats.

With a discounted price tag of USD $55, Alcohol 120% normally costs Euro € 78.00 for a lifetime license. Thanks to Chip.de Advent Calendar promotion, everybody can now download the full version copy of Alcohol 120% version 5.5.7.6719 with lifetime license. Alcohol 5.5 is the older German retail version that does not support Windows 7.


To grab and download your free Alcohol 120%, follow these steps:

1. Visit the Chip.de promotion page at the following URL:

http://www.chip.de/downloads/Alcohol-120-Vollversion_45252017.html

2. Click on “Zum Download” button.

3. You’ll be redirected to another page (may have intermittent in between). Click on “Download-Server CHIP Online” link to start the download for setup installer of Alcohol 120% v5 Blu-ray.

Tip: Download should automatically start. If not, just click on “Zum Download” again.

4. Unpack the downloaded Alcohol_5_Blu-Ray-CHIP.zip, and run Alcohol_5_Blu-Ray-CHIP.exe to start the installation.

5. On the installer screen, click on Internet to launch the registration page for the free license serial key code, which is the following URL:

http://www.al2c.de/alcohol/register/ALC-20282000/999999999/0/502

6. Fill up the form with email address, title, first name, last name and country, and tick the check box to accept receiving marketing materials. Click the “Weiter” button to submit.

7. Check the Inbox for an e-mail from Franzis Registrierungsteam with the subject title of “Registrierung: Alcohol 120% 5.0 Blu-ray – CHIP”, which asking for confirmation of your registration. Click on the confirmation link contained inside the email.

8. Another e-mail with the same title and from the same sender will be received, and the email contains two codes – user ID (customer number) and personal registration unlock code.

Enter the user ID and the registration key into the two fields in the setup installer, and then click “OK”.

9. After completing the registration, hit “Weiter” button to start the installation of Alcohol 120% Blu-ray.

10. On “Franzis Starter” screen, click on “installieren” (or on the image) to start the installation proper.

Install Alcohol 120%

The rest of the installation is in English, so just follow on screen instruction. At the end of the installation, re-enter the user ID and registration code when prompted to complete the installation, and the fully functional, full version and fully unlocked Alcohol 120% v5.5.

The Alcohol 120% Blu-ray version 5.5 supports Windows XP and Windows Vista only. It does not support 32-bit (x86) nor 64-bit (x64) Windows 7.
Read More
Posted in | No comments

Sunday, 31 October 2010

Step By Step Guide for Windows Server 2008 Domain Controller and DNS Server Setup

Posted on 08:02 by Unknown


Click on Start > Run
The system will start checking if Active Directory Domain Services ( AD DS) binaries are installed, then will start installing them. The binaries could be installed if you had run the dcpromo command previously and then canceled the operation after the binaries were installed.

The Active Directory Domain Services Installation Wizard will start, either enable the checkbox beside Use Advanced mode installation and Click Next , or keep it unselected and click on Next
The Operating System Compatibility page will be displayed, take a moment to read it and click Next
Choose Create a new domain in a new forest, Click Next

Enter the Fully Qualified Domain Name of the forest root domain inside the textbox, click Next
If you selected Use advanced mode installation on the Welcome page, the Domain NetBIOS Name page appears. On this page, type the NetBIOS name of the domain if necessary or accept the default name and then click Next.

Select the Forest Functional Level, choose the level you desire and click on Next.

Make sure to read the description of each functional level to understand the difference between each one.

In the previous step, If you have selected any Forest Functional Level other than windows Server 2008 and clicked on Next , you would then get a page to select the domain Functional Level. Select it and then click on Next
In the Additional Domain Controller Options page, you can select to install the domain Name Service to your server. Note that the First domain controller in a forest must be a Global Catalog that’s why the checkbox beside Global Catalog is selected and it cannot be cleared. The checkbox is also selected by default when you install an additional domain controller in an existing domain, however you can clear this checkbox if you do not want the additional domain controller to be a global catalog server. The first domain controller in a new forest or in a new domain can not be a Read Only Domain Controller (RODC), you can later add a RODC but you must have at least one Windows Server 2008 Domain Controller.

I want to set my DC as a DNS Server as well, so I will keep the checkbox beside DNS server selected and click on NextIf you don’t have static ip assigned to your server you will see similar to the following screen now you need to assign static ip and start the above process.

If you don’t have static ip assigned to your server you will see similar to the following screen now you need to assign static ip and start the above process.

Now you will have the location where the domain controller database, log files and SYSVOL are stored on the server.

The database stores information about the users, computers and other objects on the network. the log files record activities that are related to AD DS, such information about an object being updated. SYSVOL stores Group Policy objects and scripts. By default, SYSVOL is part of the operating system files in the Windows directory either type or browse to the volume and folder where you want to store each, or accept the defaults and click on Next
In the Directory Services Restore Mode Administrator Password (DSRM) page, write a password and confirm it. This password is used when the domain controller is started in Directory Services Restore Mode, which might be because Active Directory Domain services is not running, or for tasks that must be performed offline.Make sure that you memorize this password when you need it.

Summary page will be displayed showing you all the setting that you have set . It gives you the option to export the setting you have setup into an answer file for use with other unattended operations, if you wish to have such file, click on the Export settings button and save the file.

DNS Installation will start
Followed by installing Group Policy Management Console, the system will check first if it is installed or not.

Configuring the local computer to host active directory Domain Services and other operations will take place setting up this server as a Domain Controller active Directory Domain Services installation will be completed, click Finish.

Click on Restart Now to restart your server for the changes to take effect.

Once the server is booted and you logon to it, click on Start > Administrative Toolsyou will notice that following have been installed :
Active Directory Domains and Trusts
Active Directory Sites and Services
Active Directory Users and Computers
ADSI Edit
DNS
Group Policy
Management

That’s it now your new win server 2008 domain controller with dns server setup was completed.

For complete screen shot please refer the link.
Read More
Posted in | No comments

How To Install and Configure DNS Server in Windows Server 2003

Posted on 07:59 by Unknown
Before You Start
Before you start to configure your DNS, you must gather some basic information. Internic must approve some of this information for use on the Internet, but if you are configuring this server for internal use only, you can decide what names and IP addresses to use.

You must have the following information:
Your domain name (approved by Internic).
The IP address and host name of each server that you want to provide name resolution for.
Note: The servers may be your mail servers, public access servers, FTP servers, WWW servers, and others.

Before you configure your computer as a DNS, verify that the following conditions are true:
Your operating system is configured correctly. In the Windows Server 2003 family, the DNS service depends on the correct configuration of the operating system and its services, such as TCP/IP. If you have a new installation of a Windows Server 2003 operating system, then you can use the default service settings. You do not have to take additional action.
You have allocated all the available disk space.
All the existing disk volumes use the NTFS file system. FAT32 volumes are not secure, and they do not support file and folder compression, disk quotas, file encryption, or individual file permissions

Install DNS
Open Windows Components Wizard. To do so, use the following steps:
Click Start, click Control Panel, and then click Add or Remove Programs.
Click Add/Remove Windows Components.
In Components, select the Networking Services check box, and then click Details.
InSubcomponents of Networking Services, select the Domain Name System (DNS) check box, click OK, and then click Next.
If you are prompted, in Copy files from, type the full path of the distribution files, and then click OK.

Configure DNS
Start the Configure Your Server Wizard. To do so, click Start, point to All Programs, point to Administrative Tools, and then click Configure Your Server Wizard.
On the Server Role page, click DNS server, and then click Next.
On the Summary of Selections page, view and confirm the options that you have selected. The following items should appear on this page:
Install DNS
Run the Configure a DNS Wizard to configure DNS
If the Summary of Selections page lists these two items, click Next. If the Summary of Selections page does not list these two items, click Back to return to the Server Role page, click DNS, and then click Next.
When the Configure Your Server Wizard installs the DNS service, it first determines whether the IP address for this server is static or is configured automatically. If your server is currently configured to obtain its IP address automatically, the Configuring Components page of the Windows Components Wizard prompts you to configure this server with a static IP address. To do so:
In the Local Area Connection Properties dialog box, click Internet Protocol (TCP/IP), and then click Properties.
In the Internet Protocols (TCP/IP) Properties dialog box, click Use the following IP address, and then type the static IP address, subnet mask, and default gateway for this server.
In Preferred DNS, type the IP address of this server.
In Alternate DNS, type the IP address of another internal DNS server, or leave this box blank.
When you finish setting up the static addresses for your DNS, click OK, and then click Close.
After you click Close, the Configure a DNS Server Wizard starts. In the wizard, follow these steps:
On the Select Configuration Action page, select the Create a forward lookup zone check box, and then click Next.
To specify that this DNS hosts a DNS zone that contains DNS resource records for your network resources, on the Primary Server Location page, click This server maintains the zone, and then click Next.
On the Zone Name page, in Zone name, specify the name of the DNS zone for your network, and then click Next. The name of the zone is the same as the name of the DNS domain for your small organization or branch office.
On the Dynamic Update page, click Allow both nonsecure and secure dynamic updates, and then click Next. This makes sure that the DNS resource records for the resources in your network update automatically.
On the Forwarders page, click Yes, it should forward queries to DNS servers with the following IP addresses, and then click Next. When you select this configuration, you forward all DNS queries for DNS names outside your network to a DNS at either your ISP or central office. Type one or more IP addresses that either your ISP or central office DNS servers use.
On the Completing the Configure a DNS Wizard page of the Configure a DNS Wizard, you can click Back to change any of the settings. To apply your selections, click Finish.
After you finish the Configure a DNS Wizard, the Configure Your Server Wizard displays the This Server is Now a DNS Server page. To review all the changes that you made to your server in the Configure Your Server Wizard or to make sure that a new role was installed successfully, click Configure Your Server log. The Configure Your Server Wizard log is located at %systemroot%\Debug\Configure Your Server.log. To close the Configure Your Server Wizard, click Finish.
Read More
Posted in | No comments

Setting up a DHCP server in Windows 2003

Posted on 05:09 by Unknown

The DHCP server assigns a client an IP address taken from a predefined scope for a given amount of time. If an IP address is required for longer than the lease has been set for, the client must request an extension before the lease expires. If the client has not requested an extension on the lease time, the IP address will be considered free and can be assigned to another client. If the user wishes to change IP address then they can do so by typing "ipconfig /release", followed by "ipconfig /renew" in the command prompt. This will remove the current IP address and request a new one. Reservations can be defined on the DHCP server to allow certain clients to have their own IP address (this will be discussed a little later on). Addresses can be reserved for a MAC address or a host name so these clients will have a fixed IP address that is configured automatically. Most Internet Service Providers use DHCP to assign new IP addresses to client computers when a customer connects to the internet - this simplifies things at user level.

For step by step guide with diagrams check the link.
Read More
Posted in | No comments

WINS

Posted on 04:59 by Unknown
The purpose of WINS is to allow a NetBIOS name to be converted to an IP address. Therefore computers using WINS must be using NBT (NetBIOS over TCP/IP). WINS was originally put in place to compensate for a shortcoming of NetBEUI which is the fact that it is not routable. Therefore on large Networks IP is used to transport NetBIOS and rather than using broadcasts, information is sent to the WINS server.

WINS converts Windows computer names to IP addresses but does not do name lookups based on IP addresses. The use of Windows Explorer or NET commands invokes the NetBIOS interface. NetBIOS names, if repeated on another domain that is on the network, may cause a problem since there is no way to distinguish NetBIOS names between two domains. Each computer, when booted, sends a name registration broadcast. If there is no response, the computer will use the name it registered. A NetBIOS broadcast releases the computer name when the computer is shutdown gracefully.

WINS reduces this broadcast traffic when using NBT. The registration and release is sent to the WINS server rather than being broadcast. The clients have the IP address of the WINS server and they are configured to use WINS before using NetBIOS broadcasts. A backup WINS server may be available on the network for fault tolerance.

For more info please refer the link
Read More
Posted in | No comments

Tuesday, 23 March 2010

ISA Firewall Quick Tip : Creating Detailed Reports Using ISA Server 2006 and Excel

Posted on 21:10 by Unknown

Ever wanted to create your own Reports ??? Are you wondering how to create a detailed report for a specific amount of time ,user, URL, Protocol ,etc...

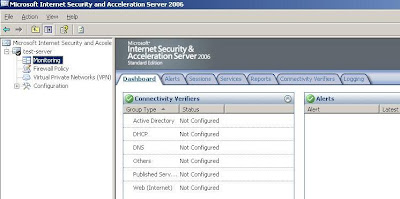
Open ISA Management Console

Under the Monitoring node, click on Logging

Example will create a report with the following filters ( you can customize your reports as needed)
a. Logging Last 7 Days
b. Action Allowed Connection
c. Protocol HTTP
d. Client Username Not Equal to Anonymous ( Here you can choose a specific user for example )
e. Specify on which Firewall Policy we want to run the logging for.

# Click on Edit Filter, to start editing and adding our filters.

# Click on Log Time, then under the Condition drop down list, choose Last 7 Days, and click on Update

Click on Action, then under the Condition drop down list, choose Equals, and under the Value drop down list choose Allow Connection and click on Update

Under the Filter By choose Protocol, under the Condition choose Equals, and under the Value choose HTTP then click on Add To List

Under the Filter By choose Client Username, under the Condition choose Not Equals, and under the Value write Anonymous then click on Add To List ( we want to monitor all authenticated users by username )

Under the Filter By choose Rule, under the Condition choose Equals, and under the Value choose the Firewall Policy you want to run the report for, in this article we have a rule called Allow Internet For All then click on Add To List

# Click on the Start Query

# The Results will be fetched and displayed . Note that a pop up windows will state that a maximum of 10,000 records can be displayed only. Click OK

If you clicked on Help, you will know the reason why a maximum of 10,000 resulted can be displayed.

Now, to copy the results to Excel, on the Right Side Pane, under Tasks, click on Copy All Result to Clipboard.
Read More
Posted in ISA Firewall, ISA Server 2006, Quick Tips, Reports, Tips | No comments

Wednesday, 27 January 2010

Avast Professional v4.8.1368 Incl Keymaker - CORE

Posted on 21:14 by Unknown
Read More
Posted in | No comments

Monday, 25 January 2010

PortableApps.com Suite Standard 1.1

Posted on 00:50 by Unknown

PortableApps.com Suite is a complete collection of portable apps including a web browser, email client, office suite, calendar/scheduler, instant messaging client, antivirus, audio player, sudoku game, password manager, PDF reader, minesweeper clone, backup utility and integrated menu, all preconfigured to work portably. Just drop it on your portable device and you're ready to go.

the packages include:
Mozilla Firefox, Portable Edition (web browser)
Mozilla Thunderbird, Portable Edition (email)
Mozilla Sunbird, Portable Edition (calendar/tasks)
ClamWin Portable (antivirus)
Pidgin Portable (instant messaging)
Sumatra PDF Portable (PDF reader
KeePass Password Safe Portable (password manager)
Sudoku Portable (game)
Mines-Perfect Portable (game)
CoolPlayer+ Portable (audio player)
OpenOffice.org Portable* (office suite)
Writer (word processor)
Calc (spreadsheet)
Impress (presentations)
Base (database utility)
Draw (drawing)
Download from here.
Download From soft82.com
Read More
Posted in | No comments

Monday, 18 January 2010

Microsoft drops free migration tool for Exchange 2010

Posted on 20:18 by Unknown
IT shops moving off of IBM Domino servers or generic POP/IMAP sources and onto Exchange Server 2010 won't be able to do it with free tools from Microsoft. The company isn't offering the Transporter Suite for the new Exchange, leaving little choice but to buy expensive third party software...
Read more
Read More
Posted in | No comments

Thursday, 14 January 2010

SoftMaker Office 2008 Free Full Version Download With Genuine License Key

Posted on 19:00 by Unknown

SoftMaker Office 2008 is reliable office productivity software that is designed for beginners and professional users. SoftMaker Office Suite consists of a word processor TextMaker 2008 with DTP features, a spreadsheet PlanMaker 2008, and presentation graphics program that can reads and writes all PowerPoint files called SoftMaker Presentations 2008. In addition, SoftMaker Office 2008 also comes with user-friendly interface and compatibility with Microsoft Office formats. The new SoftMaker Office 2008 has added a ton of features such as writes OpenDocument files, direct PDF export, OLE server, programming language BasicMaker (Microsoft VBA clone), VBA compatible macro programming, full screen mode, envelope generator, and booklet printing.

To get the free license for SoftMaker Office 2008 with free serial number follow these steps:

1. Visit the following promotional page URL:


2. Fill in your name, country, email address, and choose the version, then click “Submit” button.

Note: Users can choose either Windows nor Linux version.
3. The SoftMaker Office 2008 serial key and download information will also be sent to the email address that is used to register.

4. Use the received serial number to install SoftMaker Office 2008

5. Enjoy the free full version SoftMaker Office 2008

Softmaker Office 2008 works in Windows 9x, Windows ME, Windows NT, Windows 2000, Windows XP, and Windows Vista.
Read More
Posted in | No comments
Newer Posts Older Posts Home
Subscribe to: Posts (Atom)

Popular Posts

  • Receiving Error 'ORA-01041: internal error. hostdef extension doesn't exist.' on re-establishing a connection to Oracle.
    You can receive the error message 'Error ORA-01041: internal error. hostdef extension doesn't exist' when attempting to re-esta...
  • Google Sinks Cash into Undersea Cable
    Google has joined the Unity consortium, which will build a $300 million fiber optic cable linking the US and Japan. The 7.68 Tbps, 10,000 ki...
  • Troubleshooting the Microsoft Exchange Transport Service When It Fails to Start on an Exchange 2007 Hub Transport Server with Event ID 1032 or 1036
    Event ID: 1032 Socket Access Denied. Binding: 0.0.0.0:25. Event ID: 1036 Failed to open one or more bindings. The service will be stopped....
  • C Traps and Pitfalls (Addison Wesley, 1989, English)
    C Traps and Pitfalls teaches how the peculiarities of the C language make it easy for the intended behavior of a program and the actual beha...
  • SoftMaker Office 2008 Free Full Version Download With Genuine License Key
    SoftMaker Office 2008 is reliable office productivity software that is designed for beginners and professional users. SoftMaker Office Suite...
  • Amazon Takes the Humans Out of Fulfillment With New API
    keeps adding to its Web services. Today, it is opening up an API for its Fulfillment by Amazon service, which allows online merchants to out...
  • AP Microsoft backs Icahn's bid to oust Yahoo board
    SAN FRANCISCO - Microsoft Corp. threw its weight behind investor Carl Icahn's effort to dump Yahoo Inc.'s board, saying Monday that...
  • Suba Vesak Mangallayak Weewa !!!!
    Keep your heart free from hate your mind from worry, Live simply expect little, give much Fill your life with love forget self, think of ot...
  • How to Remove Dosearches.com homepage (Virus Removal Guide)
    Dosearches.com  is a browser hijacker, which is promoted via other free downloads, and once installed it will change your browser homepage t...
  • Alcohol 120% v5 Blu-ray Burner Free Download with Registration Unlock Code
    Alcohol 120% is a CD and DVD burning, copying, backup, recording, duplication, emulation and creation software for Windows. In addition to c...

Categories

  • ISA Firewall
  • ISA Server 2006
  • Quick Tips
  • Reports
  • Tips

Blog Archive

  • ►  2013 (7)
    • ►  October (6)
    • ►  February (1)
  • ►  2012 (10)
    • ►  September (3)
    • ►  August (3)
    • ►  July (3)
    • ►  June (1)
  • ►  2011 (16)
    • ►  August (2)
    • ►  July (4)
    • ►  June (3)
    • ►  May (1)
    • ►  April (1)
    • ►  March (4)
    • ►  January (1)
  • ▼  2010 (12)
    • ▼  December (3)
      • SPF Validation – Sender Profile Framework Testing ...
      • WikiLeaks
      • Alcohol 120% v5 Blu-ray Burner Free Download with ...
    • ►  October (4)
      • Step By Step Guide for Windows Server 2008 Domain ...
      • How To Install and Configure DNS Server in Windows...
      • Setting up a DHCP server in Windows 2003
      • WINS
    • ►  March (1)
      • ISA Firewall Quick Tip : Creating Detailed Reports...
    • ►  January (4)
      • Avast Professional v4.8.1368 Incl Keymaker - CORE
      • PortableApps.com Suite Standard 1.1
      • Microsoft drops free migration tool for Exchange 2010
      • SoftMaker Office 2008 Free Full Version Download W...
  • ►  2009 (67)
    • ►  August (2)
    • ►  July (18)
    • ►  June (23)
    • ►  April (3)
    • ►  March (6)
    • ►  February (7)
    • ►  January (8)
  • ►  2008 (319)
    • ►  December (30)
    • ►  November (43)
    • ►  October (45)
    • ►  September (12)
    • ►  August (18)
    • ►  July (27)
    • ►  June (15)
    • ►  May (7)
    • ►  April (55)
    • ►  March (65)
    • ►  January (2)
  • ►  2007 (10)
    • ►  December (2)
    • ►  November (8)
Powered by Blogger.

About Me

Unknown
View my complete profile